Are you planning to tie the knot soon and looking for ways to make your wedding more personal and memorable? If so, you might want to consider making your own wedding invitations. DIY wedding invitations are not only a great way to save money but also a fun and creative way to express your style and personality. In this article, Viva Wedding Photography will show you some simple ideas and how to get started.
1. Fantastic Pros Of Homemade Wedding Invitations

- They help you save money.
Many engaged couples are on a tight budget, and making their own wedding invitations is a terrific way to cut costs. You can save money by making your own invitations instead of buying them pre-printed, whether you do it yourself or get a file from somewhere like Etsy or Canva.
- Avoid large print minimums.
Several vendors require minimum quantities for printing invitations, which can be costly or challenging for small orders. For a small wedding with close friends and family in your backyard, there’s no need to overspend. Printing from home lets you bypass large minimum requirements and only print the exact quantity you need, no matter how small.
- Making last-minute changes is a breeze.
Having access to your invites at home—and, better yet, access to the design file—allows you to make last-minute changes without having to rely on someone else.
2. Before Making Invitations, Remember These Tips
2.1. Estimate The Expenses

Printing at home can still be costly due to the price of ink and paper, especially if you opt for premium paper or vibrant ink. Consider essential details like the size of your invitations, paper type, whether they will be flat or folded, and any additional embellishments like a belly band or wrap. Remember to include postage and envelopes. Taking all these factors into account will assist you in deciding whether the savings are worth ordering from a professional.
2.2. Think About Your Style
Don’t waste hours looking for the perfect invitations before you decide on the wedding theme and design follow it. Do you prefer sophisticated minimalism? Vivid and eye-catching? Are those watercolors? Don’t rush into looking through designer profiles without first considering your possibilities.
2.3. Make A Timeline And Preparation

Printing your own invites may be less expensive than having them professionally printed, but it does not always mean it is faster. Remember to allow yourself time, grace, and patience when printing at home because things can get tricky.
Besides, ensure you have approximately 10 percent extra supplies such as ribbon, paper, ink, and envelopes in case anything goes wrong or you need to print it again.
2.4. Select The Paper

We recommend upgrading from the standard printer paper to something more substantial. A thicker paper will typically have a more opulent feel. You might also use a textured material, like linen or felt.
Let’s visit a print shop or stationery store specializing in paper to make a selection. Before purchasing an entire ream, be sure the paper feels excellent in your hands and that you’ve tried numerous possibilities in your home printer.
2.5. Don’t Forget About File Types
If you want to minimize back-and-forth with the designer, be sure to specify in advance what print-ready file format you require. The quality of a printed PDF will be superior to that of a JPEG. However, specific file formats are needed for various printing options, such as those available online and at brick-and-mortar stores.
2.6. Consider Ink Usage

You’ve accounted for the price of the paper, but the ink may be pricey as well. So, keep in mind that a design with a colorful backdrop will require a lot of ink, which can increase that final cost.
Not to mention, some home printers may not be ideal for full-color printing, leading to imperfections and discoloration in vibrant designs. That’s why allowing the paper to show through while incorporating vibrant elements into the design could be the ideal approach for home printing.
2.7. Don’t Forget Your Envelopes
After you’ve printed off all those lovely invitations, you’ll need envelopes, of course. It is advisable to search for envelopes that will complement and accommodate your invitation. Make sure to choose envelopes that are slightly larger than your invitation to allow some space, and remember to also have envelopes for RSVP cards.
3. Simple DIY Wedding Invitation Ideas And How To Do
3.1. Hand-Painted Invitations
Make use of your artistic skills by making hand-painted wedding invitations at home. A few watercolor splatters won’t do for these invitations. They need more creativity and attention to detail. You’ll want to use high-quality acrylic paints and variable-sized brushes.

How to do:
- First, choose a pattern that fits with the style of your wedding and is easy enough for you to make. Get some scrap paper and try it out a few times before you try something more complicated, like the leaf pattern above.
- Next, your chosen designs can be drawn using a fine paintbrush. Give the paint time to dry between coats, and then go back and add depth and variety.
- If you let it dry, you’re finished. If you’re having trouble painting a complex design, try something straightforward. You can make it look like it was painted by hand with little work. Simply use brushes of different sizes to add splattered brush strokes to the corners and layering metallic colors on top.
3.2. DIY Wedding Invitations With Ribbon
If you aren’t feeling too crafty, don’t fret. A simple ribbon or bow can give a festive touch to pre-made invitations! It’s a brilliant plan to use your wedding’s color palette.
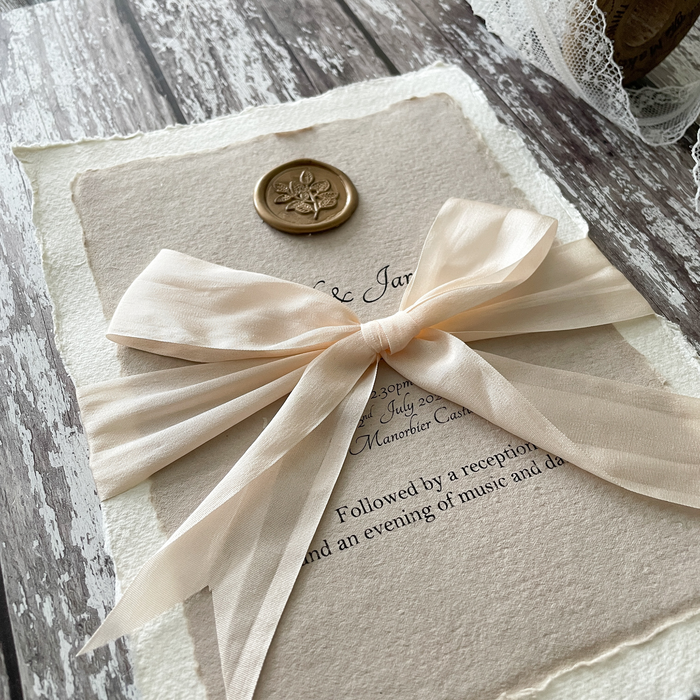
How to do:
- You’ll need ribbon or thread in the right color and quality to go with your design plan and cutters for the fabric.
- Think about how you want to fasten the ribbon or thread to the invitations before you cut it. It can be tied in a bow in the center or threaded through a hole.
- After you’ve got the look you want, cut the ribbons or thread to the correct length. Make sure to cut diagonally so that the edges don’t fray. When securing the bow or knot, include any labels or tassels you desire. So easy, right?
3.3. Wedding Invitations With Watercolor
Watercolor is fantastic because it’s simple, and there’s no wrong or right way to do it. It’s not meant to appear perfect, so even the most inexperienced do-it-yourselfers can pull it off, we swear!

How to DIY wedding invitations using watercolors:
- You’ll need a little paintbrush, water, watercolors, and paper of professional quality. If you’re using tube paint, squeeze out a small amount of each color onto a card piece. This will make blending the colors much simpler.
- Next, you need to wet your paintbrush thoroughly, and then you can dip it into your selected paint color. To achieve a two-tone effect, the original color should be dabbed into the secondary color with the wet brush.
- Brush the watered-down paint onto the card in a zigzag pattern to make spots with many colors. You can get more of a specific color by dipping your wet brush into a pot of unmixed paint but try not to be too neat about it. The key is to make it look like you didn’t even try.
Viva Wedding’s Tips
If you want to add flair to your painting, try dipping your brush into a pot of unmixed color and flicking it around your finished work with your finger.
3.4. DIY Wedding Invitations Cricut

Elevate your wedding preparations with the personalized touch of invitations crafted with the help of a Cricut machine. Cricut, a cutting-edge crafting tool, enables you to unleash your creativity and design unique wedding invitations that reflect your style and personality. Whether you prefer elegant and classic or trendy and modern, the DIY wedding invitation Cricut opens up a world of possibilities to make your invites truly special.
3.5. Wedding Invites With Flowers
Consider adding dried or pressed flowers to your homemade wedding invitations to add extra flowers to your big day. That’s a lovely method to personalize pre-made or pre-printed wedding invites. You only need some dried or fresh flowers, hammers, strings, and wax seals.
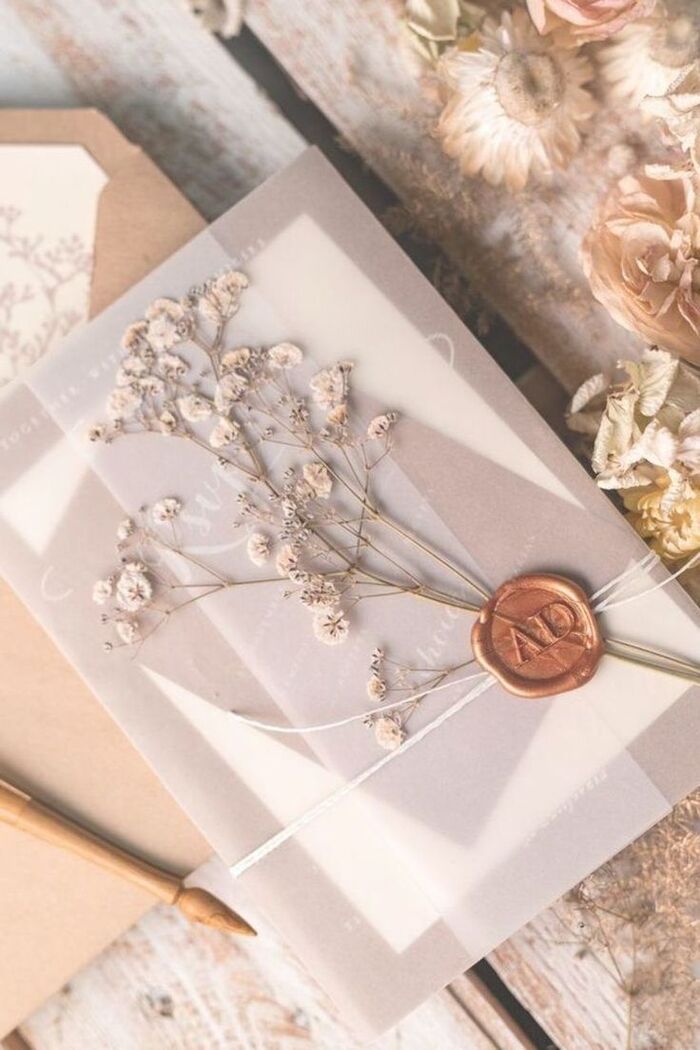
How to DIY wedding invitations:
- First, decide which flowers you want to be hammered. Then, put their heads on the cards (a watercolor card works best). After putting the flowers where you want them, hammer them flat into the card to get their natural colors to show.
- Next, take off the flowers, and there they are! You’re wearing patterns of flowers. If you don’t want to break your flowers apart with a hammer, use dried flower buds instead and glue them to your invitations with wax or ribbon.
3.6. DIY Calligraphy Wedding Invites
Why not learn calligraphy if you aren’t sure you can make all of your own DIY wedding invites? It’s perfect for those who want to be creative with invitations without giving up style.
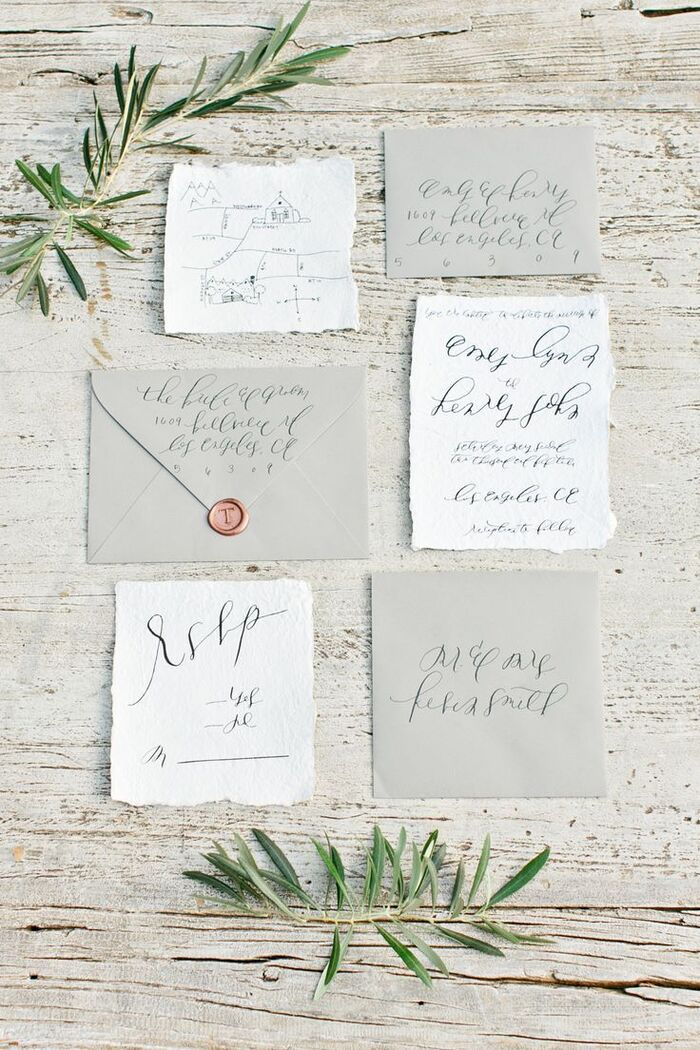
How to do:
- You will need a set of professional-grade, water-resistant card stock and a set of modern calligraphy pens in the color of your choice. It’s best to use a pencil to make a rough outline of where your letters will go.
- Use a calligraphy pen to add your letters, ensuring they all fit neatly into the space allotted. If you’ve taken the time to learn each name or statement before writing, you can keep a copy of your practice work next to the card for quick reference.
3.7. Hand-Stamp Wedding Invitations
Use a custom stamp instead of paint or glue to make your own wedding invitations look like they were made by hand. You can use some foam and ink to create your own stamp, or you can buy one already made with your initials or wedding date.
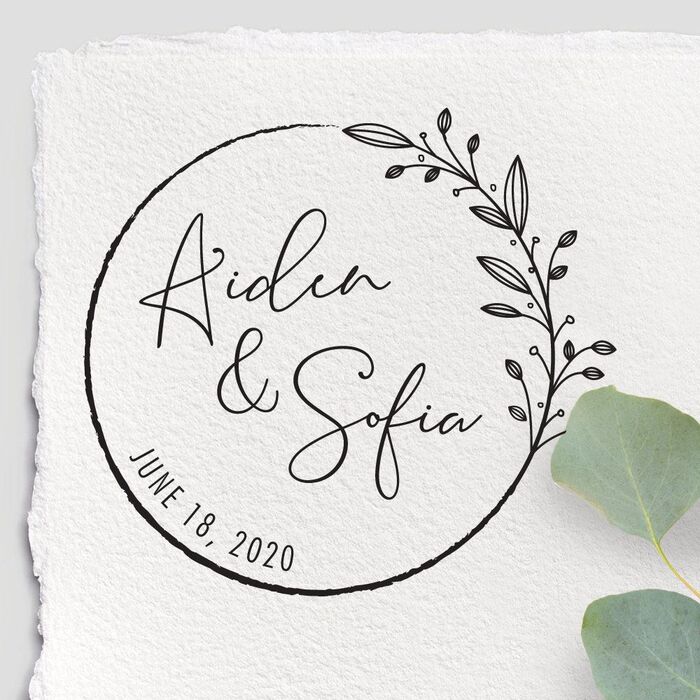
How to do:
- You’ll need stamp foam, scissors, a craft knife, a printer, any color ink you like, and putty spray.
- First, create a printout (or sketch it by hand) of your desired stamp pattern in the size you’d like it to be used. Your design could be your initials, or it could be very elaborate.
- Cut out the design carefully and remove any extra paper around your initials before spray-gluing them to your Styrofoam. Trace your pattern and cut it out carefully.
- Different letters will have to be snipped out. Then, once the glue has dried, you could dip the stamp into ink and use it to personalize your DIY wedding invitations.
3.8. DIY Wedding Invites With Gold Leaf
Gold leaf is a beautiful way to add a touch of elegance to your homemade wedding invitations and other paper goods. It can be purchased quickly and conveniently online, adding an instant air of luxury to your beautiful wedding invites.
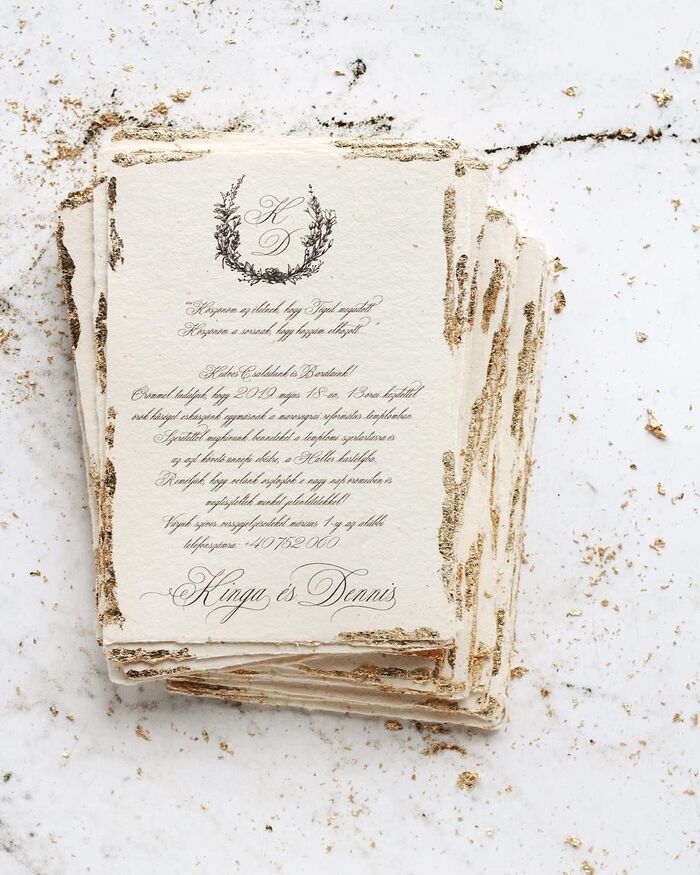
How to do:
- You’ll need flakes of gold leaf or metallic gold paint, glue for crafts, and phytoremediation of dried leaves. Put your actual, dry leaves in the desired arrangement on the card.
- After deciding where you want the leaves to go, paint or dip them in gold paint, then carefully press them into the card. It is acceptable if not all of the surface transfers to the paper; an imperfect appearance is a goal!
- Hang it up to dry, and you’re finished. Easy glitz may be achieved without breaking out the paints by applying craft glue to the edges of your invites and pressing on gold leaf flakes.
3.9. Wedding Invitations With A Wax Seal
If you’re new to DIY wedding invitations, a wax seal is a simple way to add a polished touch. They won’t break the bank, are easy to make, and will make a royal statement to your guests.

How to do:
- You’ll need light from a candle or teapot, wax for seals, a measure of one teaspoon, and your chosen postage.
- To begin, get your stamp to the right temperature for use. Follow up by placing seal wax onto a spoon and heating it over a tealight. The wax should be melted slowly and carefully until it is entirely smooth.
- Then, slowly and carefully pour the wax over the pointed end of the sealed envelope. Stamp your rubber onto the wax. To avoid dragging the wax, raise it straight up until it is nearly set.
3.10. DIY Photo Wedding Invites

The best way to add a personal touch to your save-the-date cards is to print a photo of you and your partner against a transparent background. One option is to include a cute picture of the two of you. Another is to include a picture that is both creative and related to your topic.
Also, for those who haven’t mastered Photoshop, the challenge with transparency is to have the image be black enough to be readable but light enough that it doesn’t obscure the text. It appears that 30% to 40% opacity is optimal, depending on how dark the image is.
3.11. Handmade Lace Wedding Invites
The wedding invitations will look complete once you add hot glue around the edges and wrap them in lace. Retro, boho, rustic, and one-of-a-kind are just some of the aesthetics this complements. Add some texture and effort, and you’ll be amazed at the difference in the final product.
Making their own is an excellent option for couples who don’t want to spend much money on their wedding invites but still want to send them out. You can choose from various online templates and ideas to create your own invites.
>>> Further reading:
- Summer Wedding Invitations – Beautiful Designs & Inspiration
- Fall Wedding Invitations: 30 Chic Ideas For Your Special Day
DIY wedding invitations are a wonderful option for couples who want to add a personal touch to their wedding. By making your own invitations, you can save money, showcase your creativity, and impress your guests. All you need are some basic materials, tools, and inspiration. So, what are you waiting for? Let’s pick an idea from Viva Wedding Photography‘s list and get ready to celebrate your love in style!